Showing posts with label cardboard. Show all posts

Monday, January 2

In Case You Missed LiEr’s Festival of Lights

I meant to post about this when it started but instead, I’m posting about it a week after it ended. Is anyone surprised? Nice to know that even with a new year, some things never change. : )

Anyway, LiEr over at ikatbag.com hosted a fun series all about lights and what you can do with them, especially when making kids toys. She had some incredible ideas herself and also rounded up a few guest-posters, including me!
image

Here are the projects -- click on the photos to go to each post.

Day 1: Light Boxes and Lanterns (made from a storage tub and whipped cream carton, respectively)

image  image

Day 2: Space Shuttle with light-up dashboard buttons (guest post by MaryAnne from Mama Smiles; I love the stuff she does with her kids!)

image  image
image

Day 3: Christmas Tree Nightlights (made by LiEr, with her kids)

image image

Day 4: Carousel with Lights and Sound (guest post by Katie from matsutake; she’s got mad skillz, man! and she’s my kind of hilarious!)

image

Day 5: Cardboard Dollhouse (guest post by me from here; now you can see the “wallpaper” I was taking a break from in  my last post – tee hee)

image

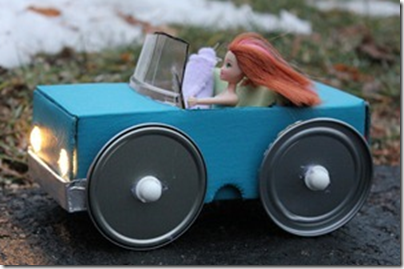
Day 6: Car and Runway (another guest post by me because we were having so much fun adding lights to anything and everything; I’d wanted to make a runway, as in airport, but designer-wannabe Sophie requested a runway, as in fashion!)
image
image  image

Day 7: Bulb How-Tos, a Starlit Stable, and a Steady Hand Game (again, by the knows-no-bounds LiEr, and her daughter Emily too)

image  image
image  image

Day 8: LED How-Tos and Traffic Lights (not only does LiEr make stuff, she explains stuff so thoroughly, and entertainingly too)

image  image

And finally, Day 9: Trainville (a train, some stations and an amazing tunnel/bridge on a huge expanse of cardboard just waiting to be decorated with tracks and trees and who-knows-what by her kids)

image
image  image

Hope you enjoyed the show! I’m so glad LiEr included me in the line-up. Playing with lights is a LOT of fun!!!

Monday, January 31

Cardboard Spaceship

IMG_3614

For a few years now, the girls have been using the kitchen stools as spaceships. I love it!

IMG_3620 IMG_3658

But I’m sure you can imagine what happens these days when there are three girls and only two stools.

While trying to console/distract/talk reason to Left-out Lucy, I spied the box that our annual gift of oranges came in.  A few cuts, a few hot glue globs, and some odds-and-ends later, Lucy had this:

IMG_3650

Originally, I’d set the extra insert off to the side. But then it needed to be glued on to the back to allow for intergalactic personnel transport.

IMG_3628

The straps were made from some pajama packaging I kept. Wasn’t sure at the time why I was keeping them, but they’re just the thing for this ship; they even have a tiny section of elastic sewed in, so they have a little bit of give when the girls tug them on and off!

IMG_3617

The steering wheel is made from two yogurt container tops, an empty spool of thread, and a long screw that we screwed right into the cardboard.

IMG_3616

Along with giving me directions on what to do, the girls also added some things themselves. Lucy got right to work decorating the shuttle walls – my favorite part is the face “with hair” that she added at the front. And Sophie designed the “control panel” with various gauges and levers.

IMG_3652

So now we have a third spaceship.

But in solving one problem, I’ve created another – no ones wants to use the stools anymore…

IMG_3631

Friday, February 5

Cardboard Canoe

More cardboard water vessels being made around since the Narnian ships aren’t big enough for real little girls. Sophie brought this box to me, asking for help because “my canoe isn’t pointy.” I’m in love with my hot glue gun (where was it all my life?!?) but needed to pull out the duct tape for this one too. Mom thought the canoe would look great with red tape all around the top edge too; but Child disagreed. Also disagreed that it needed further adornment of any kind, other than 3 stickers!

IMG_3811

I also made her a paddle (but should’ve made it with the corrugation running lengthwise so it wouldn’t bend and be so floppy) and a seat. To lend support to the seat, I cut off the long flaps of the box, then we folded them back and forth, and I glued them in place, with the seat glued on top. Strong enough now to hold even my weight.

IMG_3803

Here’s Lucy going for a paddle on the “Turn River” which, according to Heidi, is near the Grand Canyon.

IMG_3809

I’m sure I have a bigger box in the garage somewhere… but they like the small one, just the way it is.

Wednesday, February 3

Easy Paper Swirl Rose

Just in time to Valentines Day this month, here’s a quick way to make some cute flowers. Saw this idea on dozidesigns where Wendy said she got it from Martha way back when.

IMG_3777

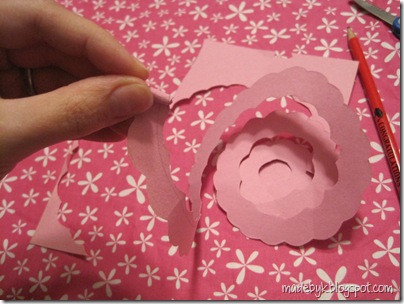
I made two out of pink scratch paper, exactly as shown in the tutorial. And they were nice, especially if you’re going for a simple, modern flower. But I wondered if I could make the swirl edge look more petal-y…

IMG_3756

Like in Wendy’s tutorial, I sketched a light swirl. Couldn’t find my cardstock scraps so I rifled through the girls’ construction paper drawer.

IMG_3772

Rather than cutting a smooth line, I cut scallops, using the sketched line as a directional guide.

IMG_3773

If you want narrower petals near the middle of the rose and wider petals near the outside, remember that you start rolling from the end of the swirl so that’s where the narrow scallops would need to be. I didn’t remember that fact until about 5” into my cutting. I think next time I might make all the petals even wider…

IMG_3774

Starting from the outside end of the swirl, roll up the paper. Since it’s curved, it will naturally flare out more along the top/outer edge.

IMG_3775

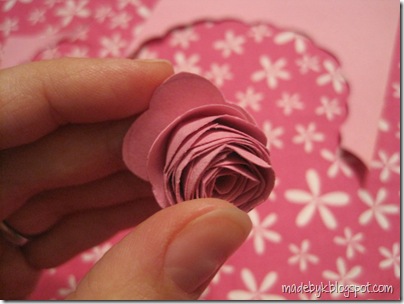
Roll it all up into a tight coil…

IMG_3776

…then just set it down and watch as it unfurls itself a bit.

IMG_3777

Wendy used her flowers as part of a lovely table setting. Depending on your intended purpose, e.g. a wreath, you might want to add a dab of glue at the base to keep the rose properly coiled. Sophie also added a paper loop to the bottom to make a fancy ring for herself.

IMG_3783

The end.

Sunday, January 31

Cardboard Ships

Apparently my girls aren’t the only ones obsessively reading or listening to the Chronicles of Narnia and then running around, recreating the scenes, British accents and all.

IMG_3722

A post by Lorraine over at ikatbag came at the perfect time last week, just when I’d been feeling the need to work on a project with the girls, but wasn’t sure what it should be—something fun that would grab and keep their attention for a while. Narnian ships, made out of cardboard – pattern included – was just the project we needed!

IMG_3720

We ended up with two ships, both of which departed from the design of the Dawn Treader in the story. Heidi’s had the dragon figurehead… but a red sail, decorated with a white Aslan.

IMG_3721

And while Sophie’s sail was purple just like in the book, she wanted a mermaid at the front.

IMG_3734

The scale of our insides was a little inconsistent – playmobile people make great captains at the helm…

IMG_3723

…but are a little too big to fit into their quarters below deck.

IMG_3726

To avoid getting small pieces stuck in those tiny quarters below, I made it so the whole floor could be lifted up.

IMG_3725

All aboard!

IMG_3724

Over the next few days, it was fun to see the girls add on – a treasure chest (filled with a crown, a “fancy pillow,” a wand, and a glass slipper among other things, some more decorations, beds, lockers and who knows what else.

Thanks Lorraine! You inspired not only me, but also a friend who visited, went home with my pattern pieces and some cardboard and made two for her girls too!  

LinkWithin

Related Posts with Thumbnails