Showing posts with label before and after. Show all posts

Thursday, June 18

I’m filled with hope and excitement…

…because while my house still often looks like this…
(for example, at 4:25pm today)  IMG_4277

...I AM making progress.
Case in point, at 4:02pm, I was able to enter this…
(a.k.a. the murky darkness of our under-the-stairs crawlspace)
IMG_4273

and, without the aid of a flashlight,
find and emerge, at 4:03pm, with this…
IMG_4276

(hence the hope – 
I knew exactly where something was
and found it in less than a minute!)

…so now I can get started on this… 
(from the brilliant yet oh-so-down-to-earth futuregirl)
ecru_bags_01_o

(hence the excitement –
it’s been way too long since I’ve crocheted something)

…but only after first throwing 5 minutes at my living room,
which at 4:30pm then looked like this…IMG_4279

Aaah, I’m definitely feeling a little serenity now too.

P.S. What would 5 minutes do in your home? Care to stop right now, go find out, and then come back and tell me about it?

P.P.S. futuregirl's tutorials are so detailed, informative, and well thought- out, with LOADS of photos – if you don’t currently crochet, you just might start after seeing her site!

Monday, February 23

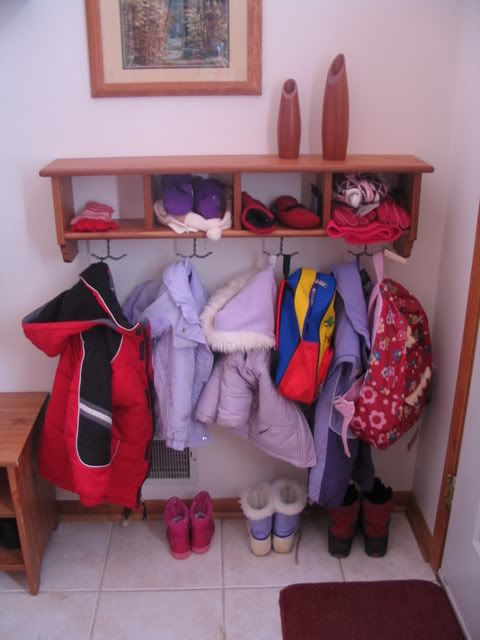
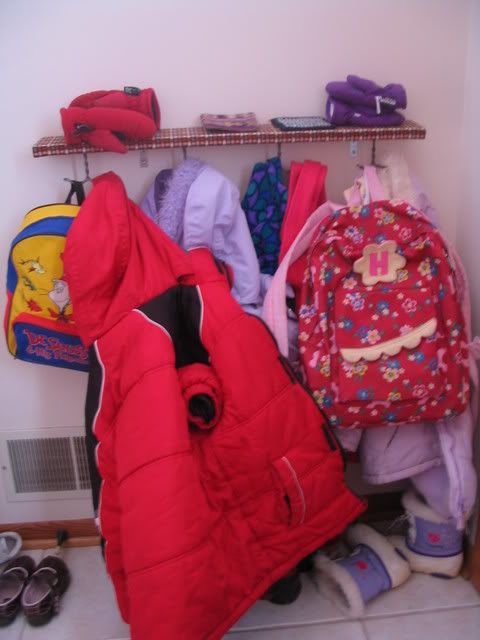
Before & After IKEA Hack: Kids' Cubbies and Coat Hooks

Here's what I did Saturday morning while Ken was away and the girls were listening to a story: finally upgraded the girls' coat hook shelf in the entry hall from my "quick fix" last May to a pretty yet simple "IKEA hack" (see more at the ikeahacker blog) using only what I already had. "Shop the house" -- my usual mode of redecorating. 'Cause it's so cheap and instant.

1) Took down a DVD shelf in the Family Room that was too small to hold all the DVDs and put the DVDs into some small zippered cases instead, kids' in the big one, parents' in the small one, and an extra one to "grow into" as needed.


2) Took down my measly little 4"-wide homemade-in-an-afternoon shelf, stripped off the hooks, screwed some holes into the DVD shelf, attached the hooks to it, hung up the shelf, and added in the accessories too.


Here are some "static" Before & After photos of the shelf. I love that it's now essentially a smaller version of the cubbies/shelf/coathook thing that Ken and I use, which is also from IKEA, also in the "Leksvik" family.


By the way, my old way of doing animated photos wasn't working reliably, so I'm using photobucket slideshows. Do you like them? They seem a little slow... Would you rather see plain photos that don't change?

Thursday, February 12

Ironing Board Cover... and update on Al's Quilt

I took the opportunity, while my parents were in town, to finally finish my mom's Christmas present. I could easily go on and on about the whys, hows and wherefores (and the why-it-wasn't-dones) but instead I'll just show the before and after...


Her board is shorter than my board, which is why the "after" looks too short. My board is modeling. I really should give it a new cover too -- it's so stained and starch-filled. Yech. But guess it's like the cobbler's kids who are always barefoot...

Speaking of belated Christmas gifts, I know I said I wouldn't post about Al's quilt again til it's done, but Mom and I got so much more done while she was here, I can't help myself.

The squares side (after I ripped out the stitches where I inadvertently caught up part of the edge while I was quilting the middle. aargh!):

And the triangles side (before I ripped out the extra stitches that made it "feel like a potholder" according to my mom; if you look at the orange diamond, you can see them: the top left part has three squares quilted into it, the bottom left has six in the picture, but has only three now in real life):

And we got a good start on the border too, for the triangles side...

I'm thinking it will be done well before his summer birthday! : )

Friday, January 30

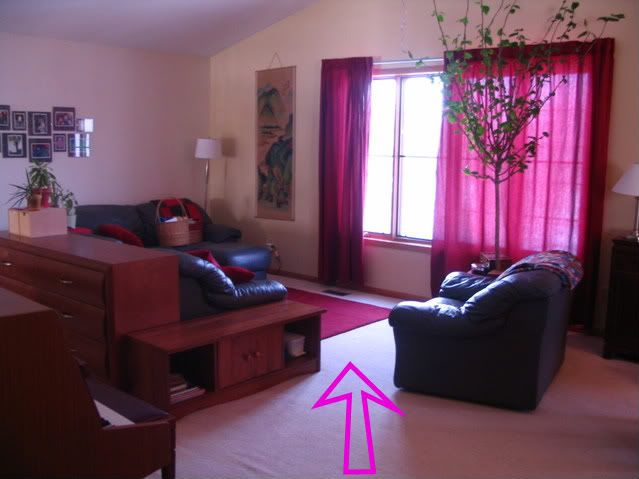
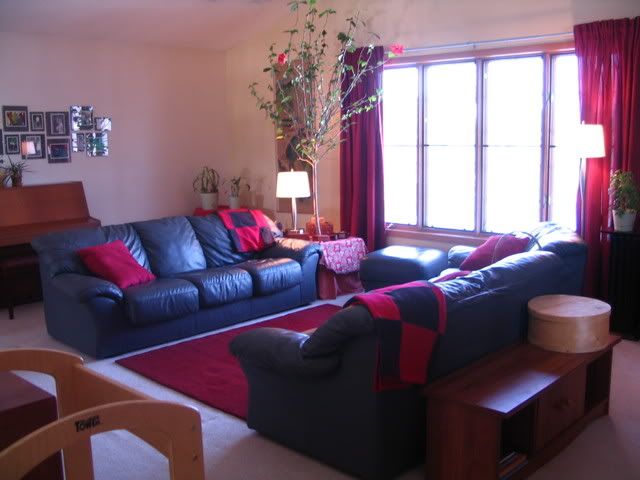
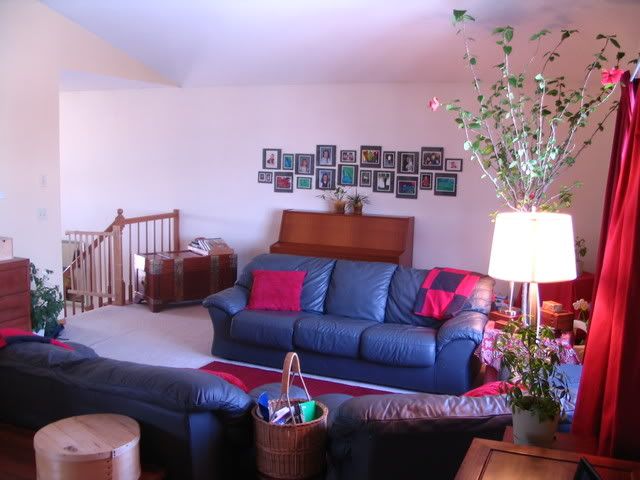
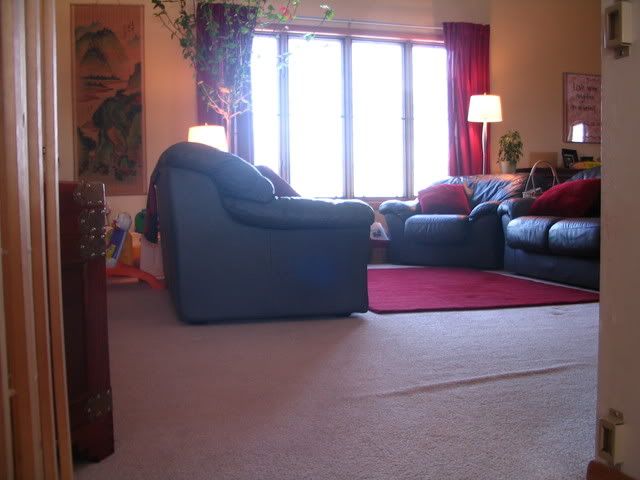
Before & After: My Living Room...

I love rearranging furniture. And who doesn't love "before & after" pictures? (Million thanks, Suz, for opening my eyes; a piano CAN be moved!!!)

Before -- nice seating area, faced the windows. But see that tiny opening between the chair and the "end table"? It was the only way in...
After: aaaah...

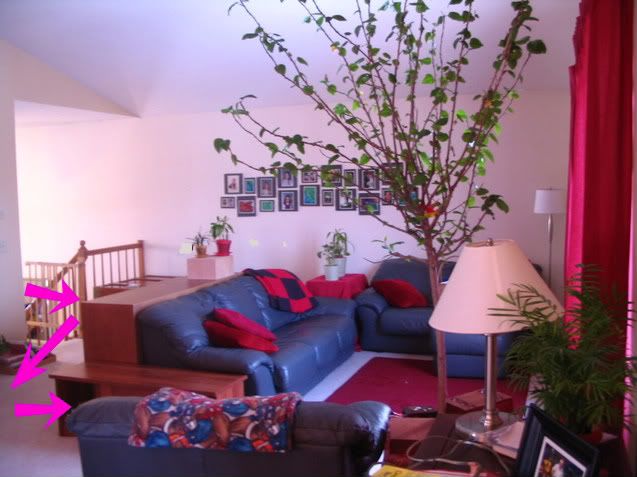
Here's another perspective, which shows the convoluted path from front door to tiny entry point! Before:

After: Yay, now you can walk right in... sit right down...

I forgot to take a real "before" shot, but this is essentially what you saw as you climbed the stairs. Nothing but drawers. And whatever small toy was currently lost under that big piece o' wood -- there was always at least one! "Before":

After: nice and open! (just disregard the carpet wrinkle...)

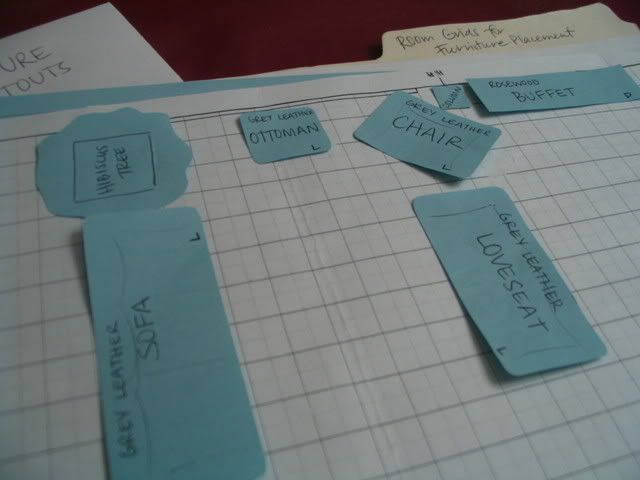
And the whole experience was made even more fun for me because just a few days earlier, I'd come across the room grids I'd made when we moved in. So Suz and I batted ideas around on paper a little before we started hefting the actual furniture.


Suz gave me a bit of a hard time about these little slips of blue on a sea of squared white. Tell me I'm not the only one who does this. (Well, other than you, Mom.) It's not like I took aerial pictures of each piece furniture and then cut those wee pictures out. Or made small scale models of all the furniture so I could move them around in 3D. Oh wait, I did do that... Got a little carried away planning the nursery 6 years ago...


What can I say... it was pre-kids? And I like cardboard? And wee stuff? And the lights don't actually work? : ) Really, it all started because, for once, I painted a test piece on posterboard to see the actual wall color. And then things just kept going from there... (Yes, I realize I'm slightly insane. But at least I can admit it...)

LinkWithin

Related Posts with Thumbnails