Sunday, August 30

Fondant Rose and Lily

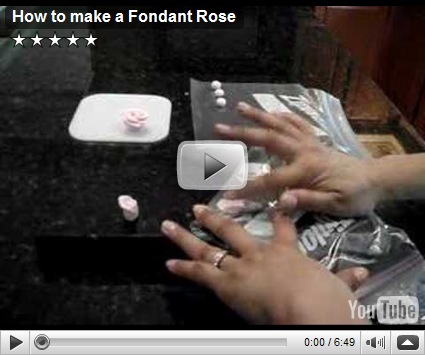
A commenter recently asked if one could make roses and lilies with this marshmallow fondant. I hadn’t tried yet. So I pulled off a hunk of fondant from all the extra in the fridge, then kneaded it to a pliable state while I watched these fantastic how-to videos I found on youtube:

(The star of these videos, Mayen, has a bunch of others too and sounds like a really friendly gal who loves what she’s discovered and wants to pass it on! So if you think you could never do something like this, stop by her place and let her change your mind.)

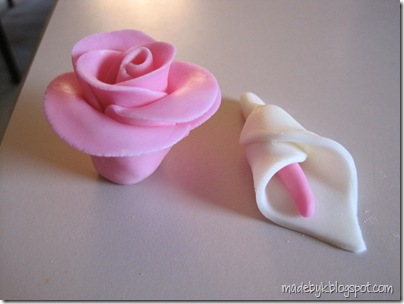
Anyway, below you can see my attempts. Nice enough, especially considering I sped through it and had the “help” of a 4-year-old who’d watched the videos on my lap and was determined to be involved.

IMG_1269

So, yes, Anonymous commenter, you can definitely make flowers by hand using the marshmallow fondant. And if you took a little more time (and didn’t have a preschool helper), you could probably make rose petals that flare out a little nicer and that don’t have tiny jags in their edges like mine do, if you’re concerned about those kind of details.

Note: I sprinkled lots of cornstarch on the counter and also onto the fondant whenever it started to get too sticky. One could also use powdered sugar.

Friday, August 28

The Wedding Budgeter

or, I Love Spreadsheets Too Much

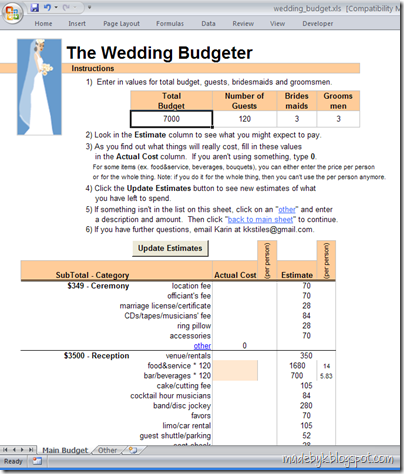
imageMy bro (the one with the quilt) got engaged last weekend. Yay, Al and Mary!!!

In honor of the news, I dug through my old files and found a spreadsheet that I created last decade, based on the budgeter I’d found at theknot.com when I was planning my own wedding. Loved theknot’s planning tools but this was back in the day of dial-up and I didn’t want to have to log on every time I wanted to update our budget. So I made my own. (See subtitle above.)

If you know someone who might like to use it, it’s available for download here.

image

And wow, supposedly the average cost for U.S. weddings these days is $20,000 more than the total shown in the photo. Wow. My sister-in-law was such a great example to me when she and my older brother married; when faced with decisions, when things weren’t done right, or done at all, when stuff went wrong, she just kept saying, “I don’t care; I just want to be married.” And she meant it!

And recently I came across a classy-looking affair done with a $4000 budget, the wedding (photos and description) of the two creative souls behind younghouselove.com! Sweet!

Monday, August 24

Mike & Adri’s Cupcake Tower

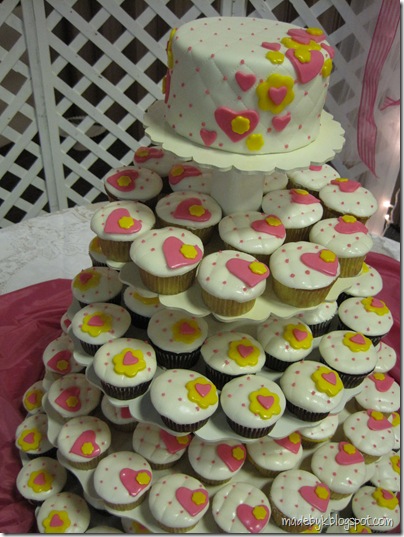
Got some photos from the wedding two weekends ago.  Here’s the towering labor of love for a couple in love:

IMG_1049

(tower designed and made by bride’s grandpa, cupcakes
baked by bride’s mom, cake and cupcakes decorated
by four other friends of bride’s family and me)

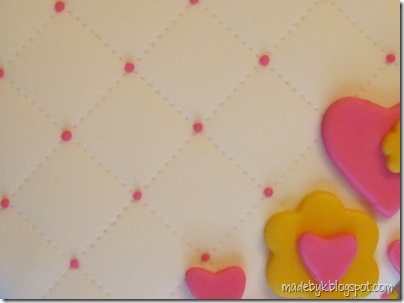
A close up of the top of the cake:

IMG_1043

The “quilted” lines were made using a tracing wheel, a technique seen on the Cake Boss episode that showed our inspiration cake. Here’s a blurry screenshot from the show… Make sense?

clip_image001

Anyway, it was a lot of fun.

But I’m glad it’s done.  : )

Wednesday, August 19

Jana’s Light Fixture and other Happy Discoveries

What a crazy week it’s been in our house.

  • Our window installers arrived last Thursday and have been here every day (except Sunday) since then. (Try putting a 2-year-old down for a nap when a guy is using a Sawzall in the next room.)
  • I’ve been decluttering and passing on still-useful stuff to Freecycle recipients. (Love my local FC group, but it does require some work, sifting through email replies, making pick-up arrangements, etc…)
  • Ken had minor surgery on Monday. All went well but he’ll be spending this whole week at home recuperating. (So now I’m tending to the needs of 4 instead of just 3 “dependents.”)
  • And on Tuesday evening, Jana, my cousin from Germany, arrived; she’ll be living with us for two years while she goes to college here. Yay! (But as of Tuesday afternoon, her closet was still filled with clothes to be sorted and moved. Eek!)

But of course there’s been fun and making and such going on, too. Keeping me happy and sane, if also surrounded by some chaos.

One thing I really wanted to get done before Jana arrived was switch out the ceiling light in her room. Ever since a run-in with the bunk bed ladder (months ago), the once-upon-a-time square glass cover has looked like this:
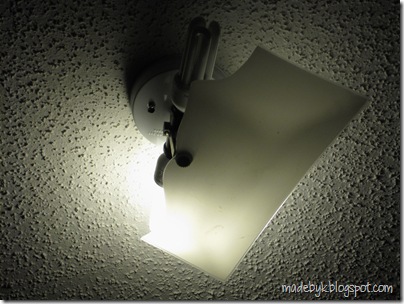
IMG_1225

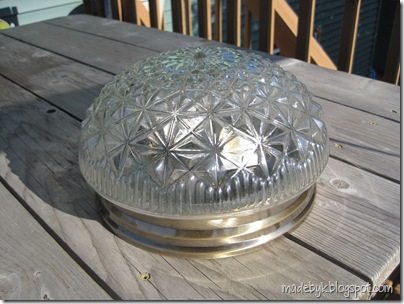
So in addition to all my offers on Freecycle recently, instead of going out and buying something new, I posted a wanted for a light fixture. Here’s the “beauty” I got for free a day later:
IMG_1207

Hmmm. (In case you can’t tell from the photo, the base of the light is that gold-ish, black-ish, ugly-ish metal that was oh-so-popular 20 years ago when our house was built.)

Spray painted the base – and the “knob” I intended to add on – a bright silver. Too bright. Figured Kristi might have some black paint. Sure enough – in the 15 minutes I had between errands, she hooked me up pre-stirred paint, a rag, a foam brush, a garage to work in, and a friendly encouraging face. So then I had this:

IMG_1228

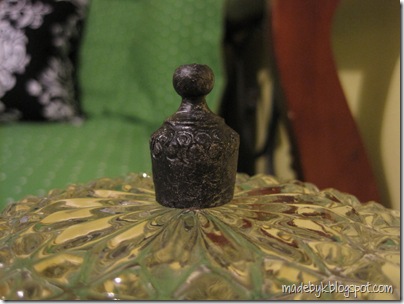
Here’s a close-up of that “knob” thingie. I wanted it to look more like fixtures that are in the stores these days.
IMG_1229

That “knob” thingie was actually the top to a rose water perfume holder that I got about 25 years ago! And that has spent the last 15 years in a box in my parents’ crawlspace until the decluttering weekend there when the box was sent home with me. And then I found it at just the right time when I was listing some other box contents on Freecycle… Anyone else needs a “knob” for an out-of-date light fixture? I still have one more. : )

IMG_1231

But really, all summer, I’d been hoping to find a chandelier-y fixture to hang in Jana’s room. Well, what did I see in the window of a boutique I’d never even noticed before, on the way to bring Ken to his surgery on Monday? A couple sweet-looking chandelier-y lights, one of which now belongs to me!

IMG_1209

I also wanted to get a dresser for her room. Found this sweet little guy at one of the local thrift stores, one day before Jana’s arrival. So no time to paint it, and perhaps I won’t after all… Not sure yet. With the scuff marks and scratches, I figured it was a no-brainer. And it’s the perfect specimen to receive fabric-covered drawer fronts. But seeing it in her room now, next to the swirly-metal-and-dark-wood day bed, and the overstuffed grey leather chair, and the redone ceiling light, and the chandelier globe… it’s kinda growing on me, just the way it is.

IMG_1212

Plus, not painting it removes one more thing from my somewhat lengthy to-do list…

P.S. To Ima (and interested others): the dimensions for the Hankie Hem Dress will come just as soon as I can make them understandable for non-Mathletes...
Wednesday, August 12

Crocheted Headband: Ravelry Pattern

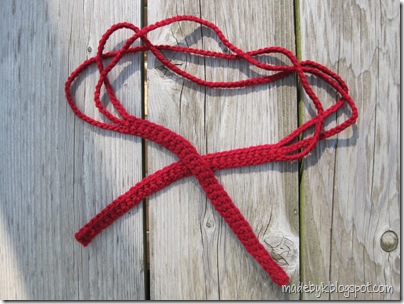
Know what this jumble of red yarn is? In case you glossed over the title of this post, it’s a headband. Crocheted in the middle of the night when I couldn’t sleep. I figured I’d try counting stitches instead of sheep.

IMG_1173

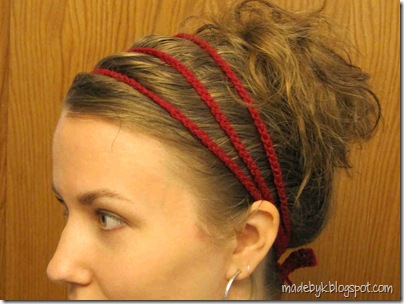
The three strands wrap over the hair; the thick long ends are the ties. Perhaps makes more sense when seen on a head. Please enjoy the following photo; taking a non-turtle-like picture of myself took about three times as long as making the actual headband!

IMG_1163k

Pattern is by Marta, a talented Italian who blogs at creativeyarn and shares many free patterns, including a flower and a bowtie that could be used to further adorn the headband. I found the patterns on Ravelry, a great “social networking site” made with crocheters and knitters in mind and they’ve been near the top of my project queue for a while now.

image

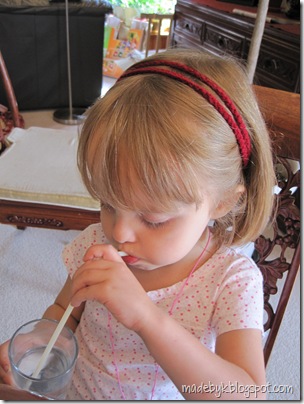
Next morning, when Sophie saw mine, she wanted one too. So I adapted the pattern to fit on her smaller head: the ties are still 30 stitches each, the chains are 55 instead of 80, and there are only two instead of three.

IMG_1171

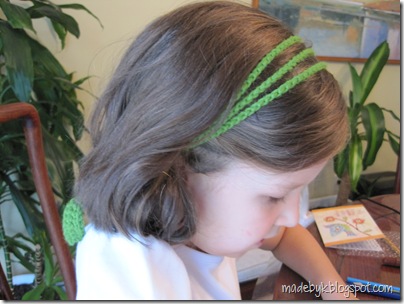
Woke again last night (this time not because of a crying child; for no discernable reason really) and still wasn’t asleep after 30 minutes. So got up for a spell, and here’s Headband #2. Or, #3, if you count Sophie’s. Modeled by daughter – who really doesn’t like headbands much – so I wouldn’t have to go the contortionist self-portrait route again.

IMG_1175

Maybe it’s time I got the yarn for the cardigan at the top of my queue. Working on it for 20 minutes at a time whenever I’ve been awake for more than 20 minutes in the middle of the night, I could probably finish it while it’s still warm enough to wear it…

Monday, August 10

Oops…. or, How to Estimate Fondant Needs

and How NOT to Estimate Fondant Needs

1) Make one batch, measure the dimensions of the finished brick, and calculate the volume of one batch: approx. 75 cu. in.

2) Figure out how much cake area you’ll be covering. (Remember area of a circle? Diameter times pi (3.14159)? And area of rectangle? Length times width?) My total area was about 2500 sq in.

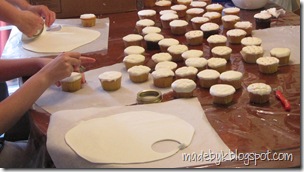
  • Regular-sized cupcakes need a 2-3/4” circle. A biscuit cutter in that size would be perfect. Don’t have that? Try a jar lid. We used a pint-sized canning jar lid – the hole in the top was helpful so we could reach through and push the circle out when it stuck a little.
    A 10” x 8.5” rectangle will fit about 12 circles. IMG_1008
  • For a round cake, you need to roll out circle with a diameter of height of cake + diameter of cake + height again + 1” just in case. My cakes were 6” rounds about 4” tall. So I needed 15” circles.
  • For a rectangular cake, you need to roll out a rectangular shape with sides of 2 x height of cake + length of cake + 1” and 2 x height + width + 1”.

3) Multiply your total area by the thickness you’ll be rolling your fondant. I multiplied by 1/4” because that’s the thickness I remembered reading about online. I forgot that I rolled the fondant for my practice cake closer to 1/8” thick. Those who are adept at math are already laughing at me now. Total volume I thought I needed: 2500 x 0.25 = 625 cu. in. Total volume I actually needed: 2500 x 0.125 = 312.5 cu. in.

4) Divide your total volume by the batch volume (75 cu. in.) to get the number of batches you need. 625 / 75 = 8.333 so I rounded up and made 9 batches!

IMG_1001
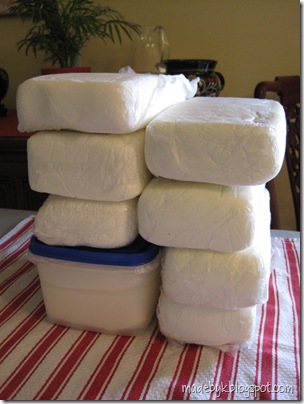
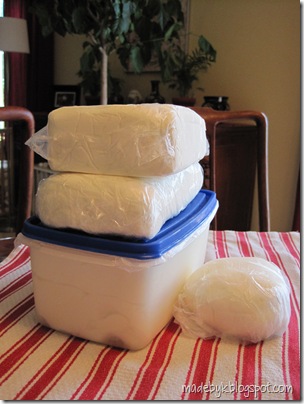
But then went and rolled the stuff HALF as thick as what I’d thought I would. Which means I only used HALF of what I made!!! Which means this is what was still leftover after all the cakes and cupcakes and decorations were done:

IMG_1094

Oops.

At least the stuff stores well. It just needs to be wrapped tightly to keep it from drying out. Some people just leave it out at room temperature; considering the long shelf-life of the ingredients—marshmallows, powdered sugar, water, and a tiny bit of shortening—this should be fine. But I’m a “throw it in the fridge” kinda girl. I think I’ll put a small bit in the freezer too, to see how it works after it thaws.

Guess I’ll be making some more cakes in the coming weeks…

* * *

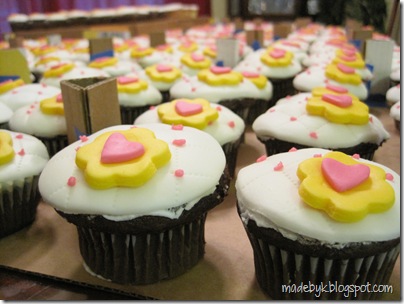
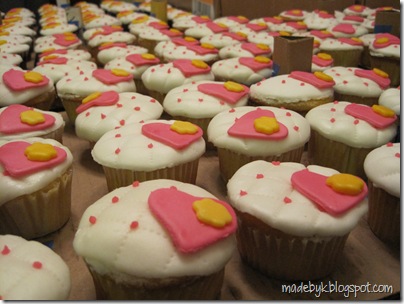
Oh, and no photos of the finished cupcake tower yet, but here are the cupcakes all spread out on my dining room table, after we added the last little heart and flower:

IMG_1028IMG_1031

Luckily, the bride’s mom is better at estimating than I am. Out of the 288 cupcakes we made, there were only a little over 2 dozen left! That’s a 90% consumption rate. (OK, OK, no more math for a while. Well, not until the Hankie Hem How-To…)

Wednesday, August 5

Quick Hankie Hem Dress

IMG_0967

Needing another break from cakes and fondant and frosting, and being inspired by the dress I just fixed up a bit, I sewed up a little dress for Sophie. (And thanks to a commenter on that post, I now know the pointy jagged edge at the bottom is called a “handkerchief hem.”)

Well, truthfully, I sewed a “skirt” and some little cap sleeves onto a ready-made tank top. Much faster that way. And less intimidating.

When I need another break, I’ll post the photos I took along the way (I was a project steps photo taker even before I started blogging, because it was such an easy fast way for me to take “notes” for when I wanted to make something again in the future…) and also some tips for figuring out measurements/dimensions, if you want to make something like this…

But be warned. If you do, your four-year-old may not want to take it off long enough to let mom wash it. Even though the front is covered with marker. And jelly. And dirt.

But that’s OK – I’ll just show you friends the back… And perhaps manage to pry it off her while she sleeps…

IMG_0987 IMG_0988

Monday, August 3

Since “modesty-fying” isn’t a real word…

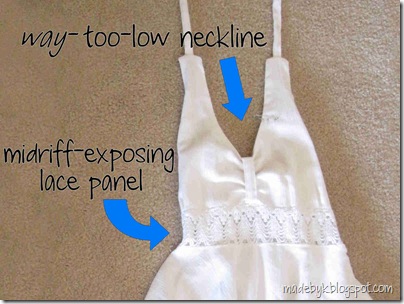
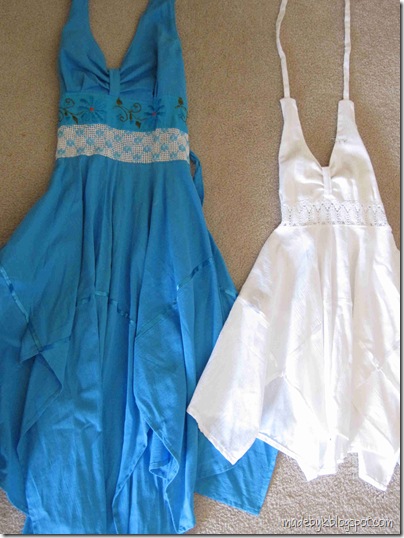
…what do you call it when you take a friend’s daughter’s cute little new white dress that has just a couple not-so-cute issues and fix it up so the modest young lady can wear it?

Here’s the Before:

IMG_0596tt

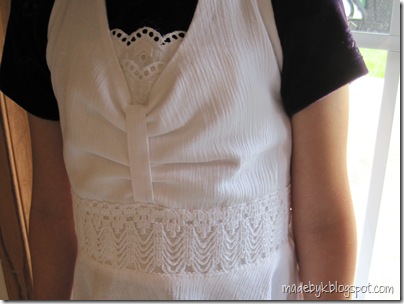
And the After (modeled by my daughter, who does not like showing her armpits?!? J, do you have a better photo of it?).

IMG_0907

I just sewed a rectangle of white material behind the lace at the waist and, inside the low V neck, I added a few rows of some eyelet that I thought kinda echoed the waist lace.

Here’s the rest of the dress (and another similar one which will be experiencing a much more drastic transformation soon).

IMG_0596x

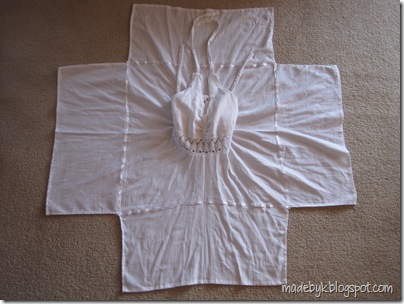
They both have such a fun jagged hem and drape so nicely. I spread the bottom of the white dress out to see how the jags were created and was surprised at the simple shapes I found: a square with a circle cut out of the middle, and four smaller rectangles. I think I see a new dress in Sophie’s future…

IMG_0597

Saturday, August 1

Another Batch Done

Just finished mixing up another batch of marshmallow fondant.

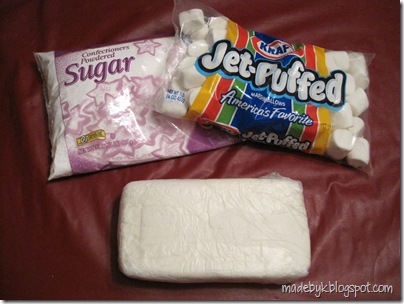
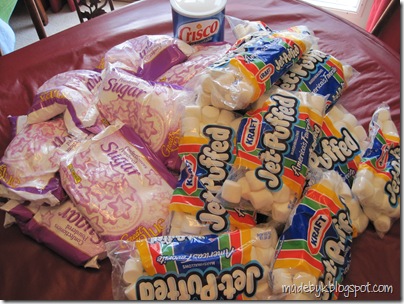
One 2-pound bag of powdered sugar
+ one 1-pound bag of marshmallows
= one 3-pound fondant brick.

IMG_0923

Which I’m hoping will be enough to cover 3-4 dozen cupcakes for the wedding in one week.

I have a few more batches to make…

IMG_0912

LinkWithin

Related Posts with Thumbnails