Sunday, December 20

More Cakes: Princess and Trial-Run #1…

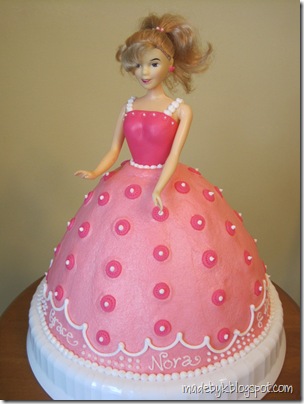
Two little cuties, sisters born one year and five days apart, are having a birthday party today.

IMG_1082[1]

A while back, their mom asked if I would be interested in making them a “princess cake.” Said I’d love to on the condition that she bake it and I just decorate it, since that’s the fun part!

IMG_2875

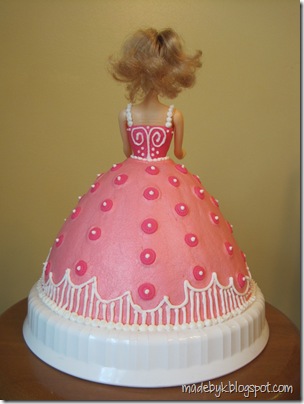
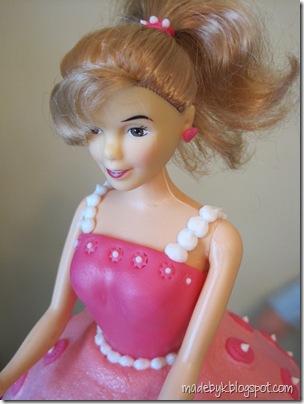
I used fondant for the bodice and big dots on the skirt, and buttercream frosting for the skirt and white trim. Not much room on the cake for a “Happy Birthday” message or spot for candles, but I did pipe their names and ages down at the bottom, below the swoopy white hem. I also arranged the dots in alternating columns of 4 and 5 (to correspond with to their new ages); I’m sure they’ll pick up on that symbolism…

IMG_2882

Tip: when you’re piping something that goes all around the cake, e.g. an edge border, start at the back. It’s hard to make the start-end junctione as nice as the rest, so why not just hide it out back? Plus, you have a bit of space to “practice” before you get around to the front, i.e. focal point. Case in point: my white swoops… a little wonky in the back, but nice, loopy, and even by the time I got to the front.

IMG_2881

* * *

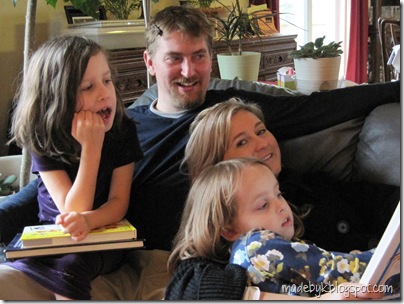
Two other cuties came to visit over Thanksgiving, my younger brother Al and his lovely fiancĂ©e, Mary (shown below with my older two, the ones who kindly put a barette in Uncle Al’s hair… to keep it out of his eyes while they read stories perhaps?)

IMG_2392

Al and Mary’s wedding is next August and I’m making their wedding cake! Since they were in town, I wanted them to taste-test a recipe for the chocolate layer: Hershey’s “Perfectly Chocolate” Chocolate Cake. (Same recipe as my friend used for the AHG Sheet cakes.) Also wanted them to taste the marshmallow fondant, not on the whole cake, just as accent shapes…

So here’s Trial-Run #1.

IMG_2366

Verdict: Yum! Since a certain barette-wearing uncle was looking over my shoulder, reminding me how hungry he was, I hurried and didn’t get the buttercream as smooth as I would’ve liked – I’ve been trying out the “Paper Towel Method” lately. And the top was so crooked. But lucky for us, wrinkles and slantiness don’t affect taste!

IMG_2367

I think I’ll do a few more Trial Runs between now and August. I’m pretty sure my family won’t mind that idea…

Thursday, December 17

Instant 80s Hair

…Hmm, I’m not sure how to write this. Any way I put it, at some point I’ll have to admit that I had some extra hair of mine just laying around (in a nice neat braid) in my closet. A hair-donation attempt that didn’t work out… Will they think think that’s weird? Or creepy? Or “no wonder she has a messy house – she’s can’t even throw away her old hair…”?

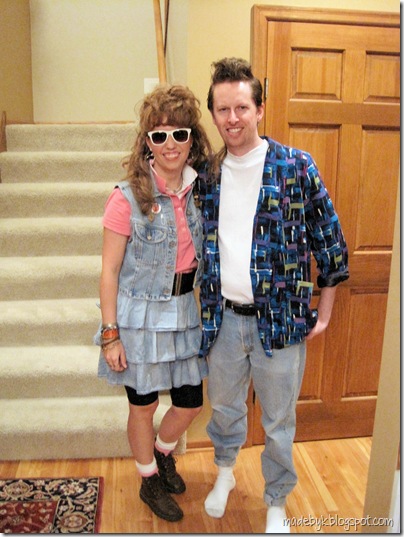
Well, that extra hair it sure came in handy for a party last weekend. Some dear friends of ours host an annual Christmas celebration. This year, they decided to add an 80s theme and encouraged people to dress accordingly. Here’s my man and me… and my hair…

KandK 80s

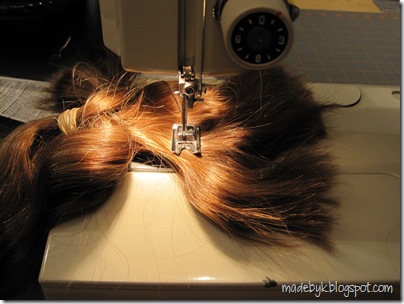
If you’re still reading (and are intrigued rather than repulsed), here’s a fun photo. Can’t say I’ve ever sewn this “material” before…

IMG_2641

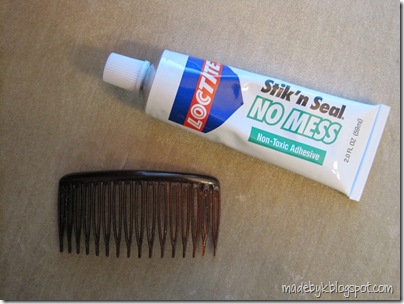
In the end, the sewing was unnecessary. Some glue and a comb (and some cardstock) was all I needed. Well, and a curling iron of course. And lots and lots of hairspray…

IMG_2774

Result: Well, I don’t think I would’ve won “Best Dresses Female” without the hair. (There were some great outfits there!!! Hilarious what we wore back then!)

face without bangsface with bangs

And the bangs (or “fringe” for you non-American English speakers) have been making the rounds in the house, instantly transporting people back 20 years… even if they weren’t alive two decades ago.

Like my 4-year-old daughter and my 19-year-old cousin…

IMG_2769IMG_2738

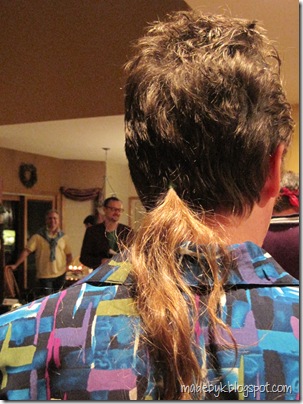
Oh, and my man won “Best Dress Male.” My hair might have helped out there too. There was just a small bit of ponytail leftover after my project; he saw it while getting ready and remembered back to the days of the rattail. Little bit of tape and he was set. Ugh! (Or rather “Gag me with a spoon!”)

IMG_2694

Monday, December 14

Serendipitous Spritz…

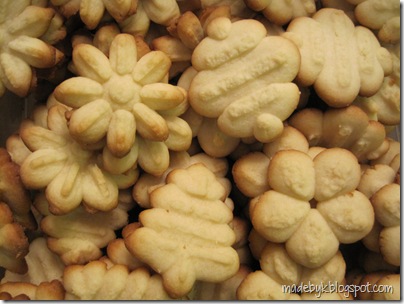
Finally asked my friend Jenna for her spritz cookie recipe after talking about it last month.

IMG_2741

It uses 3 egg yolks.

Which I already had sitting in a bowl in the fridge, waiting to be used after I turned their whites into royal icing the other day.

What a perfect December pairing – icing for a gingerbread house and Christmas Spritz. And no wasted egg parts. Makes me happy.

* * *

P.S. The barbarians have been out pillaging…

IMG_2743

Sunday, December 13

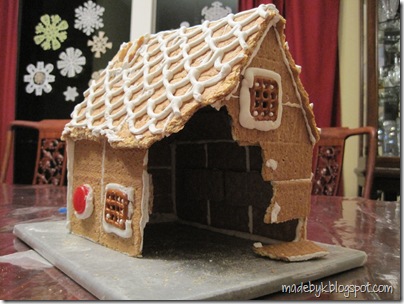
Graham Cracker “Gingerbread” House

IMG_2682

Hurray for neighbors who give me a box of graham crackers when I haven’t planned ahead for an imminent kids’ Christmas party to which I need to bring a constructed gingerbread house to decorate and now I’m surrounded by snow and frigid temperatures and therefore don’t want to take three kids out just to buy crackers or one of those kits that I saw multiple times in various stores yet didn’t throw in my cart for some unknown reason.

We got the house put together and we were only a little late dropping Sophie off to preschool because of it. (We wouldn’t have been late if I’d just let the kids eat Doritos in the car on the way there and called it “lunch.”)

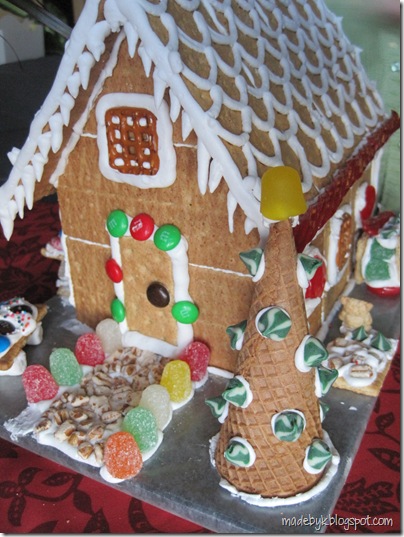
I tried to save time by looking for graham cracker gingerbread house blueprints online, and even started following one of them, but didn’t like where it was headed – too small for 3 kids and a momma to work on, to0 squat, too.... So used the few pieces I’d already cut as a jumping off point and then worked on making a cottage more to my liking, with a steeply-pitched roof and overhanging eaves.

Including the broken pieces we couldn’t use and the ones we ate (better than Doritos for lunch, right?), we used a whole 14 oz. box of crackers. And I snapped a few photos along the way in case it turned out like I was hoping. Here they are if you’d like to try it too…

Oh, wait, the icing. I first made a quick batch of Gingerbread House Construction Glue a.k.a Royal Icing. Which I had never used before but, wow, I really like it!

Royal Icing Recipe (one of many many versions!):

  • 1 lb. confectioner’s sugar
  • 3 egg whites
  • 1/2 tsp. cream of tartar

(I’m told the cream of tartar helps the egg whites get fluffier when mixed…  And if kids eating stuff with raw egg in it gives you the heebie-jeebies, you could make it with meringue powder. But I didn’t have that in the house either. Plus we’re a batter-bowl-lickin’ household; I’m good with a little raw eggs in my kids…)

Beat ingredients for 7-10 minutes. Royal Icing dries fast so makes sure to keep it in an air-tight container. I loaded mine into a pastry bag with a round tip – you could also use a freezer bag (thicker plastic than sandwich baggie; less likely to break!) with the corner snipped off.

OK, now the photos…

Roof Layout – 8 whole crackers, 4 for each side IMG_2659
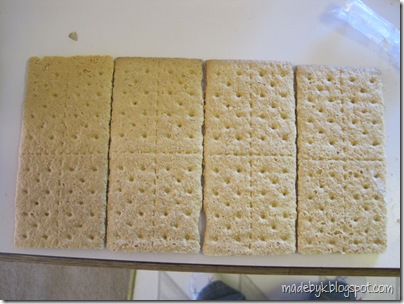
Side walls layout – 6 crackers with about 1/4 cut off each one, 3 crackers for each sideIMG_2658
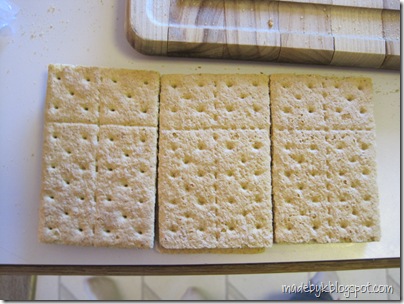
End walls layout – 6 crackers total; for each end, 1 whole cracker and 2 with bits cut off as shown in photo. I found it easiest to line them up, then score a line from the center of the top edge of the top cracker to the middle of the side edge of the second cracker.
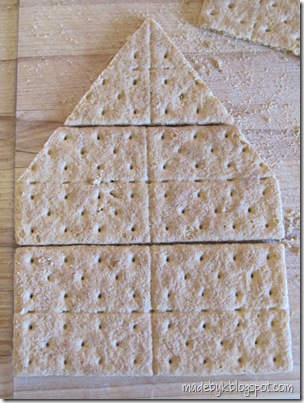
IMG_2657

Note: for cutting the pieces with minimal breakage, I used the tip of my knife to cut a shallow line, then cut a little deeper on the next pass, and usually by the third, the cracker would break along the line. Sawing with a serrated knife worked well too.

IMG_2664

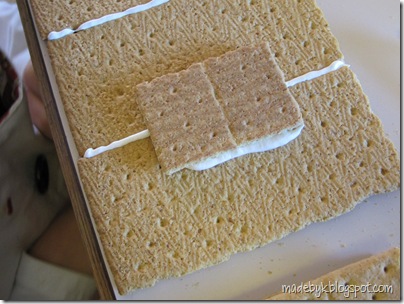
We glued together a “multi-cracker panel” for each roof and wall piece first, reinforcing it along the seams as shown below.

Icing piped along an edge…IMG_2662
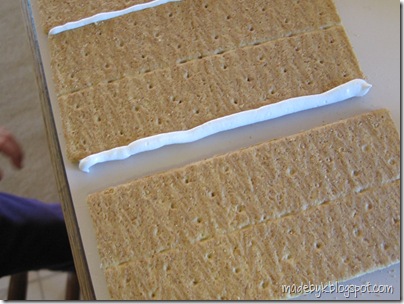
Next piece squished into place…IMG_2663

Glob of icing for the reinforcement piece… IMG_2660
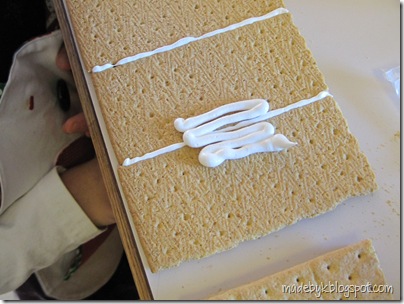
Scrap cracker glued over seam
so it’s less likely to buckle or come apart… IMG_2661Note from personal experience: Keep your reinforcement pieces near the center of the panels, i.e. not too close to the edges, so they aren’t in the way later during the building part!   
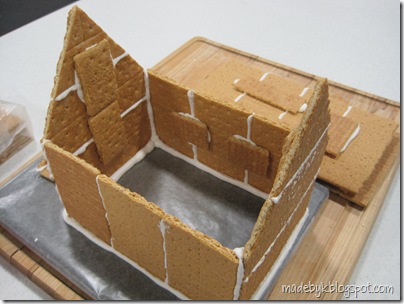
Once the panels are set, pipe some icing along their edges and form the house, keeping the reinforcement pieces to the inside – unless you were slick enough to make them look like windows and doors… IMG_2667
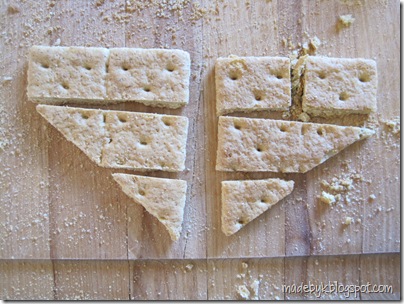
And while the girls were scarfing down their lunches, I realized I could turn the two scraps from one of the pointy wall cuts into a chimney. First, I cut two of the pieces into thirds, as shown below, and cut one of the long rectangles in half.IMG_2665
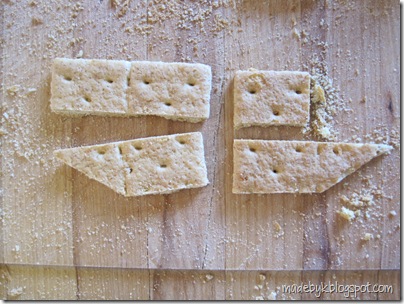
Then I discarded the two bitty triangles and one of the little triangles, leaving me with four pieces for my chimney…IMG_2666
Don’t have a close-up of the chimney, but here’s the house, pre-decorations. Oh, later we stuck another scrap (1/4 piece) on as the front door.
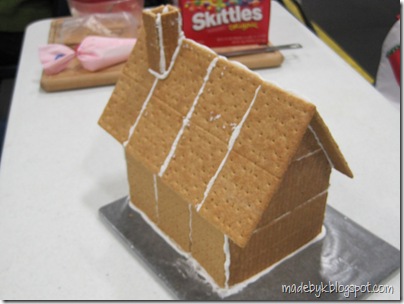
IMG_2669

Have fun! I’d love to see photos if you make this! Here’s ours again…
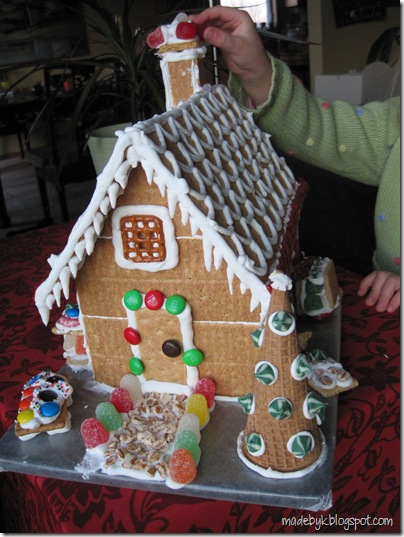
IMG_2688

P.S. Yes, this was supposed to be a “kids activity” but no, my children did not pipe the shingles and the icicles. Or anything else on the house itself for that matter.

They told me where, I piped, they stuck stuff.

The other moms gave me plenty of flack about that. I did eventually come to terms with the idea of letting a 2-, a 4- and a 6-year old wield the pastry bag; next time, I’ll try not to let it take me so long… I sure did love what they came up with on their own.

Especially Sophie’s “fence” (shown below right).

IMG_2687

What it lacks in perimeter it makes up for in thickness.

* * *

And coming soon, my latest harebrained project… Or is it hair-brained?
Wednesday, December 2

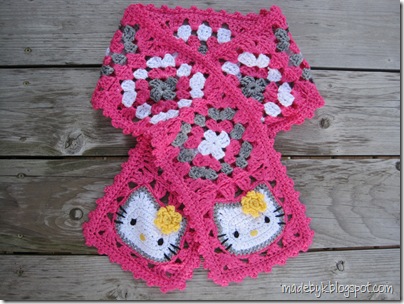
Hello Kitty Granny Square Scarf Pattern

IMG_1379

OK, so people keep asking for the pattern for this scarf. I wrote it up and have been sending it out, but I keep finding out about more mistakes and confusing parts and and and.

I want to help people enjoy making this scarf, not pull their hair out while they muddle through.

So next idea, put the pattern here instead.

But it got way too long, so I put it here... 

All I can say is Longest. Post. I Ever. Wrote.

Sunday, November 22

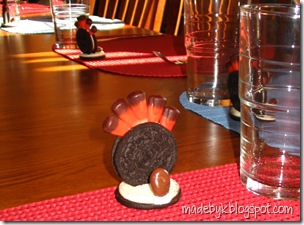
Yummy Turkeys for your Thanksgiving Table…

I haven’t posted since Halloween and now it’s already Thanksgiving here in the States. How did that happen?

IMG_9069

Anyway, here’s a fun little snack we made with the kids a few years ago: tasty turkeys… that my kids didn’t complain about eating!

The above photo is the only one I could find. But they’re really simple to make. For each turkey you need:

  • 2 double stuf oreos
  • 5 candy corns
  • 1 raisinet (or some other chocolate covered something)
So then to make your little turkeys:

  1. Twist/pull one cookie off one of the double stuf oreos so you expose the frosting. There’s your turkey’s body.
  2. Eat the cookie so you have the energy needed to finish.
  3. Stick the second oreo—standing on edge—into the frosting of the first oreo near the side.
  4. Stick the candy corns upsidedown into the top of the second oreo. There’s the tail.
  5. Stick the raisinet into the frosting in front of the tail. There’s the head.

And it’s done. Yum.

Wednesday, November 4

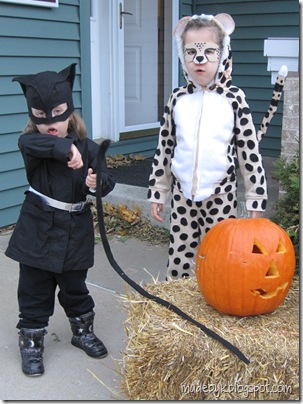
Short Post-Halloween Recap

So here are my little Catwoman and Cheetah. Picked this photo since it shows not only the costumes but also the current level of health in our house. (My littlest, Purple Cat, didn’t even make it outside…)

IMG_2140

At one point last week, I wondered if it was even worth it to finish the costumes since I didn’t think they’d actually get used; the girls had been lethargic all day Thursday and Friday. Happily, by Saturday, they seemed to be on the mend, so we forged ahead and got things done.

But Monday, the Ick started up all over again. And this time, it included me too. So that’s the end of this recap.

Thursday, October 29

Non-droopy Tail for Animal Costume How-To

There seems to be a cat theme in our house for Halloween this year. So that means lots of tails. Lucky for me, there’s only one new one to make this year – the rest are being dug out of the costume box. Like Purple Cat’s tail from last year.

PurpleCat

If you want to make your own non-droopy animal tail, here’s how:

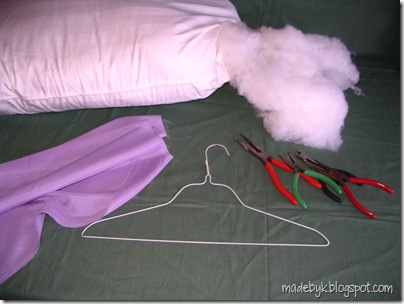
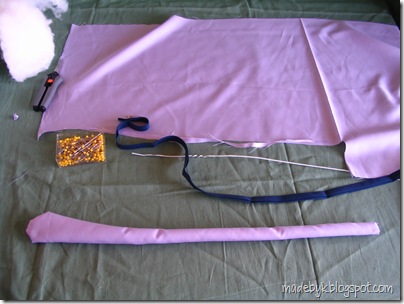
You need a wire coat hanger, some stuffing, some fabric and other stuff like needle and thread, pliers, etc. A ribbon* and safety pin will come in handy for turning the tail right-side-out. (*Actually, I used bias tape ’cause that’s what was laying around. Anything long and stringy would do…)IMG_9828

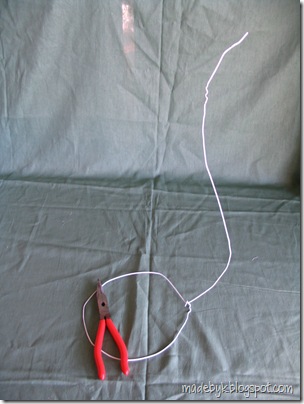
Straighten out the coat hanger, then form it into a loop that fits around the wearer’s waist. Bend a little hook into one end of the loop and a sharp corner at the other so the hook has something to… um, hook on to. (Where's a thesaurus when I need one?) In the photo, the tail portion is also bent into a nice tail shape; don’t do that yet; keep it nice and straight for now. Also, in the photo, the loop is a nice circle. In order to actually be worn comfortably by a human, it should be an oval. But you'd figure that out yourself as soon as your then-3-year-old says "Mommy, too tight!" IMG_9835

(For an adult’s tail, you’ll probably have to first twist two coat hangers together; most of one hanger will be used up for the loop…)

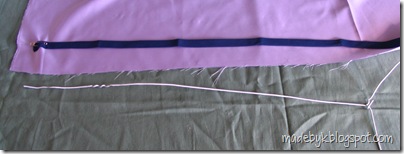
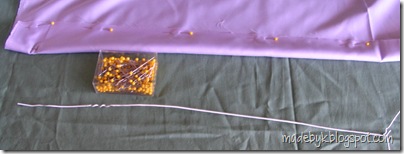
Pin the ribbon onto the right side of some fabric, near the edge. Make sure it’s longer than the tail. (You'll cut the fabric after it's sewn.) IMG_9836

Sometimes, I take all these pictures and then later, am not sure why. Does anyone really need to see what a safety-pinned ribbon end looks like?... Ooh, maybe I wanted to document that you need to keep a little space beyond the pin so you can sew around it?IMG_9838

Next, fold the fabric up over the ribbon, right sides of the fabric together. Pin if you want. The ribbon should lay right along the fold.IMG_9840

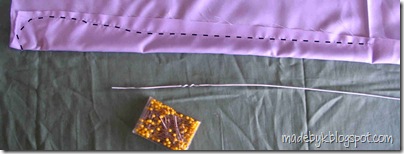
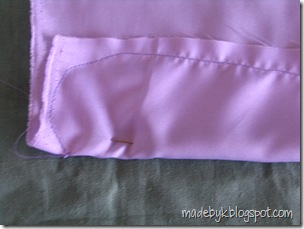
Sew a tail-shaped seam, making sure not to catch the ribbon in the seam.tail seam

Again with the close-up…. And in the moments between inserting all the pictures then adding all the text so far and now, I forget why I thought this photo would be at all helpful... IMG_9841

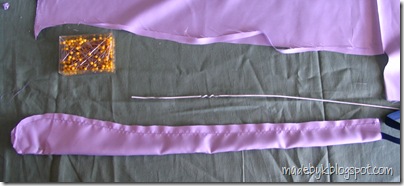
Next, cut around the seam. Remember that ribbon on the inside… (I didn’t want to cut mine.) IMG_9847

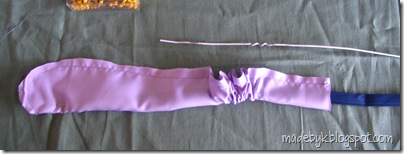
Turn the tail right side out. The wrinkles in the photo are in the wrong spot – I found it easier to start near the tip of the tail, pulling on the ribbon while I coaxed the fabric to turn in on itself…

IMG_9848

Unpin the ribbon, then start stuffing the tail. And finish off by maneuvering the wire through the stuffing. See, that’s why I recommended it stay straight.IMG_9854

I didn’t do anything at the base of the tail to keep it attached near the loop, though some quick basting stitches to pull it tight (or even some well-placed tape) would’ve kept it from raveling unraveling** and wanting to ride up the tail a little or lose a bit of its stuffing. Actually, I just hooked the hook around it; that held it nice enough.

(**Wait, I think “ravel” and “unravel” are synonyms! That’s crazy! )

PUBLIC SERVICE ANNOUNCEMENT: This tail, while so cute and fun, is also very boingy and—depending on how you shape it—right at eye-level of any peers of the person wearing it. So if said person whips around quickly, they might take out an eye of said peers. That would make for one sad cat.

IMG_9859

So, use at your own risk. Especially on costumes for preschoolers. Or boys.

Monday, October 26

Costume Boots for Cheap!

I like the way Sophie’s mask turned out, but my favorite part of the costume is her boots. In one of the Catwoman images I looked at for inspiration, she had these real chunky boots on. But wasn’t sure where I’d find a pair like that, for cheap, in Sophie’s size…

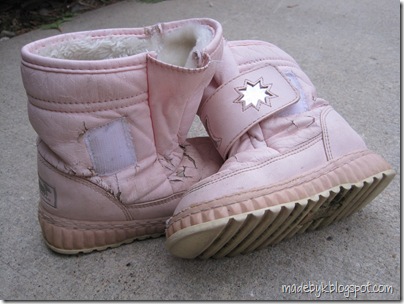
Then I remembered these boots that had seen better days, were no longer watertight, were replaced last year, but still fit Sophie and for some reason hadn’t been thrown away.

IMG_2064

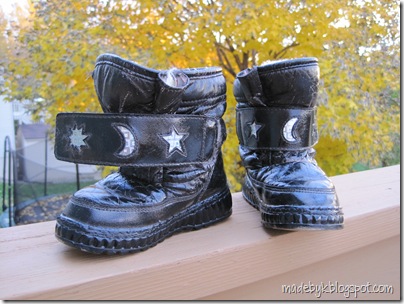
Add some black spray paint (and blue painter’s tape to mask off those great silver shapes) and we got some cute “rugged” super villain boots.

IMG_2085

Total cost: 97 cents (for the spray paint, that I need for another project anyway)

LinkWithin

Related Posts with Thumbnails