Showing posts with label woodworking. Show all posts

Sunday, January 24

Hanging a Large DIY Wipe Board

As mentioned here, one of my framed glass wipe boards just hangs from a picture wire. Which is fine because I only write on it once a week.

But the other one is written on daily. And is bigger and heavier. So I wanted something stronger and more stable.

boards1French Cleat

Years of watching HGTV to the rescue! (Or was it on Trading Spaces?) …I remembered seeing a large headboard attached to a wall using a french cleat, which is made from a board cut in half lengthwise at a 45° angle. One half is attached to the wall and the other half to the hanging piece, such that the two halves lock into place. Here’s a video in case my picture there isn’t enough.

Note: there also needs to be a spacer at the bottom to keep it from swinging towards the wall and tilting the whole piece. So I started with a wider board and made two cuts: one straight (creating the spacer), one angled (creating the cleat pieces).

boards

Another Option

boards eyescrews iso

boards eyescrews

If you don’t have a way to make an angled cut but have some eye screws, another option is to twist the eye screws into the back of the frame near the top. Then attach a board (e.g. a 1x2) to the wall, rest the eye screws on top of it, and drive a nail or screw through each eye screw hole into the top of the wall board. Again, you’d need a spacer at the bottom too. 

Bi-Level Hanging

In my case, I wanted to hang the board out of Lucy’s reach, but I also wanted Heidi to be able to comfortably write on it at times. Lucky for me, my cleat boards were too long. So I cut off the extra 5” and used the two pieces to form a second hanging level – you can see them in the photo below left. Photo below right shows it hanging at that lower level and you can also see the long high-up piece from which it usually hangs. (Yeah, that was  out of Lucy’s reach… before Lucy figured out how to push various pieces of furniture over there as stepstools!)

DIYwipeboard (24)DIYwipeboard (19) 

boards2 Note: I screwed the short little pieces—and the long piece too—into studs for added strength.

I also made sure, when placing the lower level, that it was high enough so it wasn’t in the way of the spacer at the bottom of the frame. See figure at right.

You could do the bi-level hanging with the eye screw option too; you’d just need to attach another 1x2 with nails/screws in the right spots.

Happy decorating!

Wednesday, February 25

Speaking of...

I've been enjoying reading about Kerri's Lovely Little Handmades and seeing her beautiful quilt projects over the past month. Well, she is now hosting a giveaway for some amazingly lovely fabric. Unless I'm super lucky when she randomly selects the winner on Feb 28th, this photo is probably as close as I'll get to all these beautiful reds and aquas and browns... And mushrooms! People, there are mushrooms in the mix! So jump on over and throw your name in the hat. And while you're there, ooh and aah at some of her other stuff.


Speaking of
reds and aquas, this is what my blog wants to look like when it grows up; Shannon's blog design is absolutely fantastic. Which is not surprising since she designs blogs professionally. And her posts ain't too bad either. Was inspired by this one to do this:
I don't like treadmillling when I'm watching TV; would rather be curled up next to Ken. But while surfing, blogging, emailing, finding recipes, etc.? Hey, this just might work!

Was also inspired by Shannon's many fun and lovely cakes, and the last photo of this post in particular, to ask her how she keeps from getting ginormously-huge domes on her cakes, like I do. Her secret: bake at 325 instead of 350. I'll have to try that on my next cake.


Speaking of
cakes, I thought it would be fun to host a little cake decorating class in mid-March for anyone who's interested in trying it (and who lives nearby in SEMinn). With the right tips--I meant metal decorating tips, but "tips" as in "hints" works too--you can do some cool stuff that's really quite easy. Email me directly so we can figure out more details (kmskms at charter dot net). It would probably be a weeknight evening, after the kids are in bed.

(This is a set of "sampler" cakes I made for a friend after she decluttered and gave me ALL her cake decorating stuff four years ago! Jenny, you were talking about being generous? I want to give gifts like this! Want to give the "good stuff" that I don't use -- if I'm honest with myself -- not just the "old stuff" I'm tired of!)


Speaking of
bed, I should go to mine. But hey, I burned over 200 calories tonight!

P.S. Does throwing a few extraneous boards (took 'em off the footboards of the bunk beds) and laying them on the arms of the treadmill warrant adding the "woodworking" category to this post?!? : )

Monday, February 23

Before & After IKEA Hack: Kids' Cubbies and Coat Hooks

Here's what I did Saturday morning while Ken was away and the girls were listening to a story: finally upgraded the girls' coat hook shelf in the entry hall from my "quick fix" last May to a pretty yet simple "IKEA hack" (see more at the ikeahacker blog) using only what I already had. "Shop the house" -- my usual mode of redecorating. 'Cause it's so cheap and instant.

1) Took down a DVD shelf in the Family Room that was too small to hold all the DVDs and put the DVDs into some small zippered cases instead, kids' in the big one, parents' in the small one, and an extra one to "grow into" as needed.


2) Took down my measly little 4"-wide homemade-in-an-afternoon shelf, stripped off the hooks, screwed some holes into the DVD shelf, attached the hooks to it, hung up the shelf, and added in the accessories too.


Here are some "static" Before & After photos of the shelf. I love that it's now essentially a smaller version of the cubbies/shelf/coathook thing that Ken and I use, which is also from IKEA, also in the "Leksvik" family.


By the way, my old way of doing animated photos wasn't working reliably, so I'm using photobucket slideshows. Do you like them? They seem a little slow... Would you rather see plain photos that don't change?

Wednesday, June 11

Front Door Garden

Last year, we got some nice lettuce and spinach from our SFG, but then the weather got too hot and the rest of our stuff "bolted" and turned bitter. Then I read somewhere that salad grows well when it gets just morning sun, so figured a spot by our front door would be perfect. My lettuce experiment is getting started a little later than I would've liked but figured first step is to build the bed. I'll worry about planting it later. So yesterday, I got to wield some power tools and turn this:

into this:
Well, the 2'x4' plywood bottom isn't shown in the top photo, but everything else came from random wood left in the shed by the previous owners... At first I wasn't sure how it would all go together (wanted to keep the plywood base a little elevated above the top of the wall, needed a way to keep the box from tipping over, etc.) but hooray for Google Sketchup where I was able to model a mock-up, test out ideas virtually, even get the needed dimensions once I'd decided on a design. Mmm, brought me back to my days of teaching Pro/ENGINEER.

And just 'cause I'm a geek and 'cause I love the "sketchy lines" setting in Sketchup, here's a image capture of the virtual box... Anyone need anything modeled? (as in virtual 3D, not catwalk) Suz, I think I hear bunk beds calling my name next... : )

Next, sanding, painting, mixing dirt, planting (lettuce seeds and probably a few flowers too). Better get a move on or it'll be 2009 before I harvest any salad.

Wednesday, June 4

Outdoor safety gates for my littlest climber...

I have a little munchkin who loves stairs right now. The carpeted half-flights of our split entry make me nervous enough; there's no way I want her near our deck stairs. But man-handling one of the heavy chairs on our deck onto its side and wedging it into the opening at the top of the stairs every time we're out on our deck is not a acceptable long-term solution. And there's the problem of what to do when we're all outside in the yard. I turn my head for two seconds and she's already clambered up five steps. So a couple weekends ago, passing by a garage sale, I saw the answer. Or answers. One nice, strong, secure Evenflo gate for the top of the stairs...


and another for the bottom...


And boy was it nice having two drills - one with a drill bit, the other with a driver head. I now want that for all future projects! (Thank goodness for nice neighbors who willingly let me borrow their drill. And who gave me a whole box of screws too after seeing the hardware I'd scrounged up that just wasn't working for me.)


And speaking of woodworking, there's fun stuff up ahead! Right now, it's just a pile o' lumber, a non-too-comfortable "bench" for the girls. But soon...

Tuesday, May 13

Kids' Coat Rack Shelf Thing

Ken's finally home again, arrived late Thursday night. Then, Saturday, we had a "pirates & princesses" birthday party for Heidi, but since I haven't downloaded those pictures yet, I'm posting another past project, staying with the rain theme from last week: a shelf I made, with hooks for the girls coats and umbrellas. This is no woodworking masterpiece or home dec showcase piece, but that's kinda why it makes me so happy. It's not "perfect" but it's "good enough." I made it without endless planning and researching, just during an afternoon after decluttering our entry and realizing we really needed a spot the girls could reach to hang their coats. And best of all, I only used stuff I already had around the house:
  • piece of wood from the odds-n-ends pile in the garage; not really wide enough to be a "shelf" but good enough
  • some fabric from my free stash to cover the stains, etc on the wood; not really what I would've picked if purchasing but good enough
  • some L-brackets bought for a project about 10 years ago which was never even started; not super sturdy but good enough (esp. considering the dinky width of the shelf)
  • leftover hooks from the coat rack/cubby thing hanging higher and to the left of this little one 
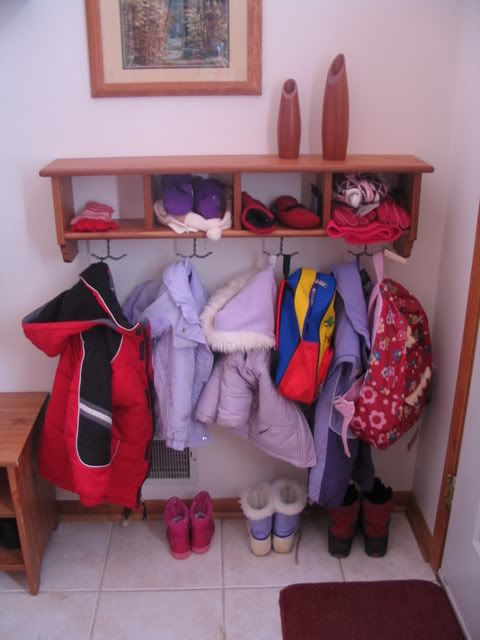
(it's hard to see in the mini-picture of it here, but the 6 hooks along the front had seemed too busy to me, especially since there were already 8 along the back, so I only attached 2 when I assembled it. And surprise, surprise, 2 years later I was able to find the other 4 I hadn't attached!); more than good enough, they're great!
What I'd really love to do is make a coat rack/cubby thing that matches the one we already have except with 3 cubbies ('cause we ain't having a 4th kid!). I salivate just thinking of the measuring and sawing and routing, oh the routing, that would be required. But by the time I actually get that done, the girls will all be tall enough to reach the IKEA one we already have or maybe even off in homes of their own by then! So the dinky, thrown-together shelf it is! : )

Friday, August 24

Laundry Bins

A while ago, I decided the reason I don't do laundry on a regular basis is that I don't have laundry sorters near the washer and dryer. If I had a container for each type of load (so I could run that load as soon as the container was full rather as soon as we were completely out of clean {fill in the blank}) as well as a place to fold the laundry, why then I'd be a laundry-doing machine! Honest!

So I started looking online and finally found the answer to all my laundry-avoidance problems:

Perfect!

And then I saw the price:
$87.99

And I needed two of them (or 4 sorters: hot/whites, warm/lights, cold/darks, no fabric softener/towels&such). With S&H, it came to $203.93. For laundry sorters. Um? No!

So after some measuring and planning, a trip to Home Depot, some sawing and drilling and screwing and nailing, another trip to Home Depot, some re-drilling and re-screwing and re-nailing, some more measuring and planning, a trip to JoAnns, some sewing, and about 8 months total(!!), I had my laundry sorters.


At some point, I plan to paint them white and add some oilcloth to the tops so they're easier to keep clean. In the meantime, I got some laundry to go do!

P.S. I had been keeping track of how much my materials were costing me but I lost that little cheatsheet long ago. But I can tell you this much: it was a lot less that $203.93. Plus I got the added satisfaction of making something myself.

Wednesday, July 27

Kid-sized picnic table.

I have always wanted to make my own furniture. So when I saw The Complete Book of Woodworking on the bookmobile, I just couldn't pass it up. Later that week, JG was over with her kids and she saw the picnic table instructions I'd marked in the book and asked if she could build one with me. Super idea! I tend to start things and not finish, so it's great to have a partner!

So we got enough materials for 2 tables, spent a few days in their big backyard measuring and sawing and saying "Oops, we marked it wrong" and buying another piece of wood and sawing it correctly this time and screwing it all together. And voila, 2 cute-as-can-be kid-sized picnic tables -- one for her kiddos and one for mine! And all it needed was four 8' 2x4s, four 8' 1x6s, and a bunch of 3" screws (per table) as well as a jigsaw for the curved cuts and another saw for the straight ones. (You could use the jigsaw for those too, but a circular saw would probably give you straighter cuts. We got to use the compound miter saw JG had on loan from a friend! Sweet!)

It took me a while longer to finally get the thing sanded (Thank you Brian for letting me borrow your orbital sander!!!) but it's done now, ready for the last bits of summer.

LinkWithin

Related Posts with Thumbnails