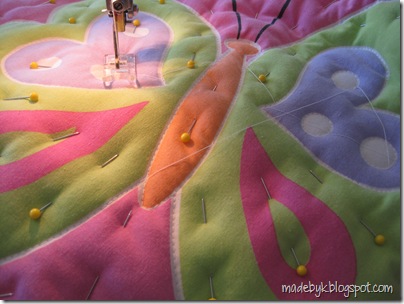
Pillow progress is definitely being made. One almost done (pins holding pillow fluff in are not visible), two to go.
Which means it’s the perfect time to start yet another project, right?
I briefly considered taking a photo of each of my other partially finished projects currently laying around in my corner of the family room, but figured I’d run out of room on the memory card.
Just kidding! I don’t have that many.
But how about just a few more photos and a poll?
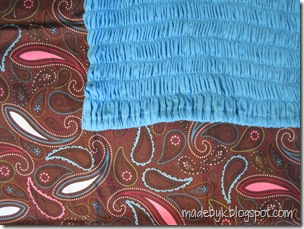
I need to pick a lining fabric for thing that’s not a blue dress anymore. The floral is a lightweight corduroy (love!) that has the same orange and olive green as in the embroidered section on the outside, but it’s definitely a “bold” choice. The other is a cotton I just picked up recently, which really reminded me of Jenny, the eventual recipient of the piece, with its paisley and pink and brown, but its only coordinating color is the aqua. What to do, what to do… Anyone care to let their opinions be heard?
The crocheted headbands are multiplying – in my drawer and recently now on my head. (The red one alone seemed too matchy-matchy with my shirt so I tied on the orange one too.)
I first saw the pattern for these over at creativeyarn. And they’re a fun, fast project, but in the comments of the pattern post, I noticed a number of people having troubles. So with Marta’s blessing, I wrote up a tutorial, including step-by-step photos and explanations for beginning crocheters; it’s posted here.
For me, they’re a great mindless task for when I wake in the middle of the night and need twenty minutes* of distraction before trying to fall asleep again.
*Note: I can’t finish one in 20 minutes. I just give myself that long before going to bed again for 20 minutes and then repeating the cycle til I eventually fall asleep… Tried reading, checking email, catching up on blogs, etc. but that easily turns into an hour. : )
I hear people like this exist, people who can’t start a new project until they’ve finished their current one. In fact, I know some personally and have heard this very phrase come out of their mouths.
And I heard the phrase repeatedly in my head this weekend as I started yet another project that’s been looping around my brain for months.
Said the soft-spoken, bewitching brain, “It’s OK, Karin, this will be a quick, simple project! You can start it and finish it in the same weekend. In the same DAY even! And with all that momentum, you can tackle all the other projects languishing on your craft table. So, go for it. Do it. You know you want to!”
“Just sew the three pieces of fabric together, turn it inside out, and the pillows will be done! Easy peasy! Really!” continued the brain.
And so the hands cut. And the eyes saw. And the brain said, “But ooh, wouldn’t it be lovely if the tops were quilted first?!?”
And oh, the other things the brain suggested. (See that cording below? Badly done, Brain. Badly done.)
In short, the project is nowhere near complete.
And to add insult to injury, the quilted pieces are so stiff, I’m not sure yet that I can use them as pillow fronts! Brain, are you happy?!?
P.S. Am also having tension trouble. Can’t seem to fix it. Grrrr.
P.P.S. I keep forgetting, when the girls are awake, to have them pick a crown recipient out of a hat. Brain is apparently too busy sabotaging my ability to ever finish any project again…
It’s what the salesperson told me I’d need for gluing the jewels onto the crowns. I didn’t really believe her. Sure the back of the bottle says “Bonds hard-to-hold times such as plastic, metal, glass, beads; rhinestones; pearls and sequins to fabric…” but isn’t the information on packaging all just hype? I’ve got plenty of craft glue at home already, in bottles that look identical save for the label – how different can the goo inside really be?!?
But I bought some Jewel-It anyway. And used it to glue jewels onto Lucy’s crown.
And just to prove how useless it was, I glued on two of the jewels using my regular craft glue. That would be the two jewels that are seen in the photo above… the ones no longer on the crown. Slight bit of pressure of my fingernails under their edge and they popped right off.
Did the same to the gems glued with Jewel-It and they stayed firmly in place. Applied more pressure. Still, they stuck fast. If I’d kept trying, e.g. had the tenacity and curiosity of a 18-month-old, I probably could have pried them off.
But wow! Jewel-It actually works, as advertised!
My Anti-Chaotic Jewel Dispersal Idea worked too. Each guest got to pick out one card when she was eliminated during Musical Seashells, a little consolation prize for being the odd man out when the music stopped. Each name penciled onto the back after selection so gems could be properly redistributed during the craft portion, at which point, the tape was peeled off and each girl had a couple dozen jewels to work with.
As for the actual application, here’s what we did:
Each girl had a cotton swab, a toothpick, and a plate with a glob of glue on it.
She used the cotton swab to dab some glue from the plate onto the back of a jewel. When it comes to glue, we usually say, “A dot is a lot and a lake is a mistake,” but in this case, we did want more than “a dot.” We wanted it to ooze out around the edges of the jewels.
Then, because fingers got sticky and tended to pull the jewels up again, she used the toothpick to hold the jewel down as she took her other fingers away.
It was so fun to see what each girl did: fast vs. slow application…
…symmetric vs. haphazard placement…
…using only some gems vs. using all plus taking donations.
And during the making, I miscounted and ended up with one extra crown. So I packaged up some extra glue, jewels, etc and would love to send it out to one of you. If you’d like it, let me know what letter (or symbol?) you’d want sewed on, and also be sure I have a way to contact you. I’ll pick a recipient this weekend some time…
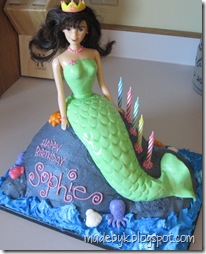
Yay, Birthday Girl and guests loved the cake. Below, read about how I made it…
For the rock and mermaid head/torso, I used the pan and doll pick from the Wilton Wonder Mold Kit, same as I used for the princess cake. But you could also bake the cake in a couple 8” rounds plus an ovenproof bowl for the top, stack them to make a domed shape, then stick a doll in the middle. (Just make sure the stack is tall enough to fit her leg length.) Here’s a Betty Crocker video of that method.
My cakes always have a domed surface on the top after baking, which I usually cut off and pop into eager mouths. But in this case, I used the scrap piece to make more rocks. I cut it into a crescent shape to fit alongside the large cake, then laid the leftover pieces on the crescent or elsewhere around the large cake. Below you can see the cake before and after frosting. (Note: the chunk in the bottom right corner of the before photo was moved to the bottom left in the after…)
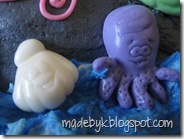
The mermaid’s tail is one big hunk of marshmallow fondant, as is her top and belt and her friendly sea creatures around her. I just treated it all like play dough, rolling and pinching and pulling and forming. In fact, we happened to have the perfect toy for the marine life shapes: the Play-Doh Octopus Set.
Sophie enjoyed sticking the bits of colored fondant into the indentations, sprayed previously with cooking spray.
But forming them by hand is possible too.
The tail was REALLY heavy. Squashed the frosting down – I was afraid it would slide right off the rock! And the tail itself sorta flattened out after I placed it – poor mermaid has a serious case of Bubble Butt. The end of the tail wouldn’t stay upright either, or wavy like I wanted; fixed both issues with some well-placed toothpicks.
Idea for “o-FISH-ally five” sentiment came from these invitations (by Megan at Ducks in a Row) that are perfect for a sea-themed party. Too bad I found them too late (and am also not organized enough to send out invitations; phone calls to parents is how I roll so far…).
Tip for lettering (other than looking at fonts online for inspiration) – practice somewhere other than the cake first. Counter works well, especially if sweet-toothed licker-uppers are nearby.
The “water” is buttercream frosting, slathered on roughly with a knife. I’d tried to only partially mix the blue, so there would be gradients of color, but by the time I fluffed around with it, it was all pretty evenly colored. So then I mixed up some more, almost white, and added it to some of the peaks.
And lastly, I brushed some water onto the fondant which makes it shiny, or in this case, like Miss Mermaid just pulled herself out of the water to sun herself dry on the rock. Apparently her hair dries much faster than do her scales.
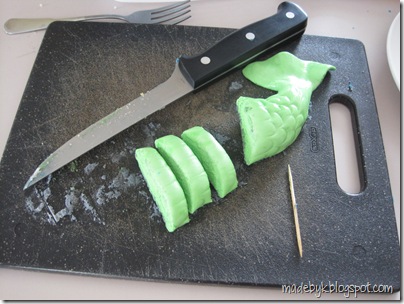
If you’re curious about anything else that I missed, let me know. I will add one last thing: I felt a little funny chopping up her tail…